
IDL Output for Web Display
QUESTION: I often want to display IDL output on my web page or in a Powerpoint presentation for my colleagues, but I have trouble making the display look as professional as I would like it to look. The fonts, in particular, are often lousy. Do you have any suggestions for how I might be able to create my IDL output so that it looks better in these presentation settings?
![]()
ANSWER: Yes, I have one highly recommended suggestion. Get a copy of ImageMagick and install it on your computer. It is available for UNIX, Macintosh, and Windows computers, and it is free. It is essential for producing professional looking IDL output that is suitable for display on the Internet or in a Powerpoint slide presentation. (Macintosh users should read this Macintosh installation tip before installing ImageMagick.) By using ImageMagick with PostScript intermediate files, PDF and raster file output is essentially identical to the output from the latest IDL 8 function graphics commands. You can see examples of how to create PostScript and PNG output from over 50 different types of plots in the Coyote Plot Gallery.
![]()
Important Note: ImageMagick has important dependencies on another open-source software project, named Ghostscript. This means it is important that Ghostscript is installed as well as ImageMagick. These issues have been discussed in recent ImageMagick forums. I recommend that you install Ghostscript first, and then install ImageMagick.
While you are visiting the Ghostscript web page, you might also be interested in downloading and installing a PostScript viewer application that will allow you to see your PostScript output. For Windows users, I highly recommend the GSView program.
![]()
Producing high-quality PostScript and raster file output can now be done automatically from resizeable graphics windows, using Coyote Graphics routines. This is described in detail in my new book, Coyote's Guide to Traditional IDL Graphics (see the book image just to the right). It is also possible to create high-quality output via the techniques described below with any Coyote Graphics command directly via the Output keyword.
To see how ImageMagick can be used, let's first write a graphics display program in IDL. Here is one that produces a contour plot. (Numerous Coyote Library programs are required to run this code.) Note that we take care in writing the program to make sure it works both on our display, and in PostScript. Mostly this is a matter of protecting certain commands that cannot be executed in the PostScript device. For example, a Window or WSet command cannot be used in a graphics program without being "protected". Normally, a command like this is protected by only issuing the command if the current graphics device supports windows.
IF (!D.Flags AND 256) NE 0 THEN Window, 500, 400
This is one of the reasons you see Coyote Graphics routines creating graphics windows with the cgDisplay command, rather than the Window command. The cgDisplay command is automatically protected in the PostScript device and, in fact, acts to create a PostScript "window" that has the same aspect ratio as the graphics window that would have been created on the display.
If you don't use a cgDisplay command in your program, the cgPS_Open command will match the aspect ratio of the PostScript "window" to the aspect ratio of the current graphics window on your display, making sure your PostScript output "matches" what you see in the graphics window.
We can run the program the Graphic_Display program like this.
   IDL> cgDisplay, 500, 400
   IDL> Graphic_Display
The standard way to create a PNG file from this graphics window is to simply use cgSnapshot, like this.
IDL> void = cgSnapshot(/PNG, FILENAME='test_1')
You can see what the test_1.png output file looks like in the figure below.
 |
| This is a normal screen capture of IDL graphics output
with the output sent to a PNG file. |
Certainly this is nothing to write home about. And the fonts look particularly hopeless. But, rest assured, there is a better way.
![]()
Using ImageMagick to Produce IDL Output
A better idea is to take advantage of IDL's ability to produce PostScript output, with stylish true-type fonts, smooth lines, etc. This is where ImageMagick comes in. With ImageMagick, you can convert IDL PostScript output into all kinds of image output using its convert command. The PostScript set-up commands I use (cgPS_Open and cgPS_Close) are designed to work with ImageMagick directly (if it is installed properly on your machine) to produce both PostScript files, and the corresponding JPEG, PNG, or TIFF files. Here is how I would go about producing the same PNG output as above, but this time using ImageMagick to do the conversion from PostScript for me. Note that cgPS_Open will set up your PostScript device in such a way that the "window" on the PostScript page will have the same aspect ratio as the currently open window on your display device.
   IDL> cgPS_Open, 'test_2.ps'
   IDL> Graphic_Display
   IDL> cgPS_Close, /PNG
The resulting test_2.png output file can be seen in the figure below. I think you will agree that this result looks considerably more professional.
 |
| The IDL PostScript file has been converted to PNG output with ImageMagick. |
(Note that if you are unfamilar with the cgPS_Open/cgPS_Close routines from the Coyote Library you will want to download them.)
If you already have PostScript files, and you simply want to convert them to raster or PDF format, you can use the Coyote Library routine cgPS2Raster to do the conversion for you. For example, to create the "test_2.ps" file you just created to a JPEG file, you can type this.
IDL> cgPS2Raster, 'test_2.ps', /JPEG
A file with the name "test_2.jpg" is created.
![]()
Improving PostScript Quality
Using cgPS_Open to configure your PostScript device has several advantages that improve the quality of your PostScript (and, hence, raster) output that are not immediately obvious. In addition to matching the aspect ratio of the current graphics window in its output, so your output looks nearly identical to what you see in your graphics window on the display, cgPS_Open also automatically switches to true-type fonts and it will increase the thickness of all PostScript plot lines to more closely match the window output. Moreover, you can control the PostScript resolution, the width of raster file output, the size of raster file output, and other parameters either globally, for all PostScript and raster file output, or for each individual file you create.
These parameters can be set globally with the cgWindow_SetDefs program. See any keyword that starts with "IM_" to control ImageMagick parameters, and any keyword that starts with "PS_" to control PostScript file parameters. Similar keywords can be used directly with cgPS_Close to configure individual file output.
![]()
User Reaction
Brian Larson points out that if you use one of the newer Macintosh computers, that PS Converter does a better job of creating nice looking output than ImageMagick. The only downside, he reports, is that you can't call PS Converter from within IDL, but instead you have to double-click on the PostScript file.
Reimar Bauer reports that on his LINUX machine he prefers the pstoimg command instead of convert. He particularly likes the -aaliastext option, which uses GhostScript's anti-aliasing feature for smoother font characters. He notes that GhostScript 4.03 or higher is needed for this. The command he uses is this:
pstoimage -type png -crop tblr -aaliastext -flip r90 -density 150 myfile.ps
It is possible to do multiple files at the same time with this command.
Paul Krummel writes:
G’day David. I have just got back from overseas and have been catching up on the IDL newsgroup posts. The ‘plotting graphics for web pages’ posts caught my eye and I thought I would send you a quick message on this topic and mention what I use. Like many people, I plot all my IDL graphics to PostScript and then convert to images (similar to what many people said on the IDL newsgroup), however I do not use ImageMagick, but instead us GhostScript. I have been using GhostScript on a windows PC for many years to do this and a few years ago wrote an IDL routine to interface with it (see gs_convert.pro). This routine could be easily extended to run under LINUX as well. GhostScript has some nice conversion options (e.g., anti-aliasing of text and graphics), support for multiple output images from multi-page PostScript files, etc. The output has always looked great. I usually convert to PNG images.Another routine I use along with gs_convert.pro is crop_image.pro (see attached) for automatically cropping an image to remove “white space,” which might also be of interest. I have attached a zip file containing these two files along with four other wrapper routines to these two. These are probably not the best written routines but they do the job for me and I thought that you may find them useful or interesting. Please make them available to the IDL community if you like.
Ken Bowmann writes that on his Macintosh machine he finds he has to add the -flatten option to ImageMagick to get it to do what he wants:
convert -density 300 file.ps -resize 25% -flatten file.png
He also reports that if you want to sort out IDL's problem of using Seascape instead of Landscape output, that you should use the -rotate 270 option. This will rotate the output properly for inclusion into other software.
convert -density 300 file.ps -resize 25% -flatten -rotate 270 file.png
cgPS_Close handles many of these details for you. For example, it will always perform the rotate operation for IDL "landscape" (really seascape) output into true landscape output. It has also been configured so you can add your own convert parameters to the call. Or, if you are a UNIX user, and you prefer to use your own UNIX PostScript conversion command, you can specify the command using the UNIX_Convert_Cmd keyword. You can see the current ImageMagick convert command by setting the ShowCmd keyword on cgPS_Close. Here, for example, is how I would create a PNG output of a histogram plot with the current default options and show the command I used.
   IDL> cgPS_Open, 'test.ps'
      PostScript output will be created here: C:\IDL\test.ps
   IDL> cgHistoplot, Loaddata(7), /FILL
   IDL> cgPS_Close, /PNG, /SHOWCMD
      convert -alpha off -density 300 "C:\IDL\test.ps" -resize 25% -flatten  -rotate 270 "PNG24:C:\IDL\test.png"
Note that these commands can be invoked more simply by simply using the Output keyword. This is a short-hand way of producing file output from any Coyote Graphics routine.
IDL> cgHistoplot, cgDemoData(7), /FILL, OUTPUT='test.png'
The output can be seen in the figure below.
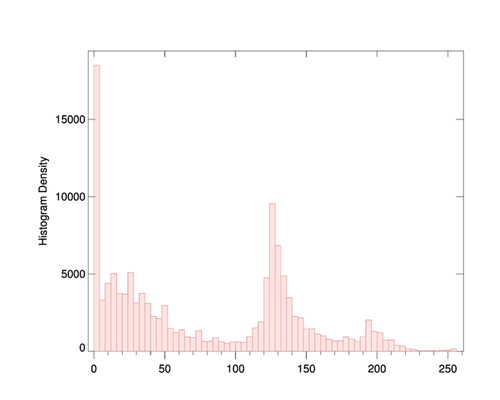 |
| The IDL PostScript file has been converted directly to PNG output
with the ImageMagick convert command and default settings. |
![]()
Version of IDL used to prepare this article: IDL 7.0.1.
![]()
![]()


